Replayability comes from variety, and the map is one of the biggest sources of it. A city that looks similar every run feels like the same run which is something that we don’t want. The game is a sandbox and procedural city generation (PCG) is one of the things that makes it one.
The pipeline is two distinct phases. First, the PCG writes a blueprint, a 2D grid where every cell holds at most one marker character that says “this is a main road segment”, “this is a 9×9 industrial plot”, “this is a lamppost”, or nothing. Once that blueprint is settled and saved, a separate loading phase walks it and instantiates the actual game objects: Road, Building, LampPost, all the heavy engine state. The split is helpful because the blueprint is cheap, inspectable, and re-runnable. You can print it. You can dump it to CSV and reload it without re-running PCG. You can stare at it until you figure out why one neighborhood looks like a parking lot. The engine objects don’t enter the picture until you’re already happy with the layout.
Inside the blueprint phase there are roughly four passes: streets, then buildings, then props, with thinning and cleanup in between. Each one reading and writing the same grid. Everything from here on is about what each pass does and what gets discarded between them. Below you can see an example (CSV) output:
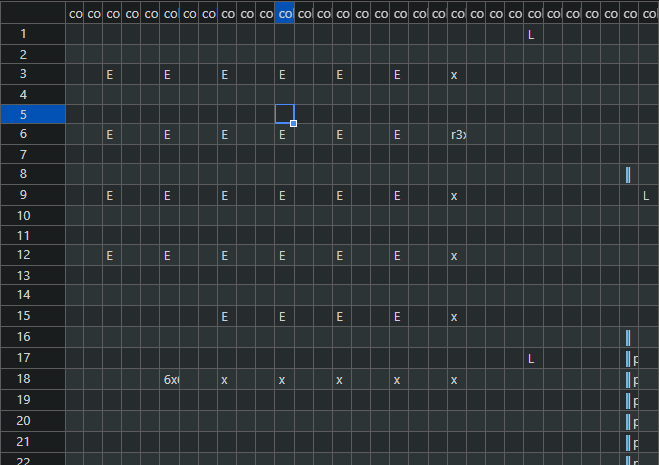
6×6 – is a 36 tile building; x – is a 3×3 commercial (smallest building possible); E – for filler buildings where there is free land inside each block; on the right side you see a vertical main road (largest street tile).
In the actual PCG, during start-up we don’t write to CSV, we pipe it straight from blueprint memory to construction phase. CSV capability will be useful later for allowing to create maps via a map editor and share them, allowing all of you to customize your gaming experience (in not so distant future).
The Grid
The blueprint is a 2D array of characters, one cell per tile. A filled cell holds a single unicode glyph naming the tile type (▌ vertical main, ▬ horizontal main, ■ junction, ═ and ║ for normal roads, the usual box-drawing set for normal junctions).
Main roads
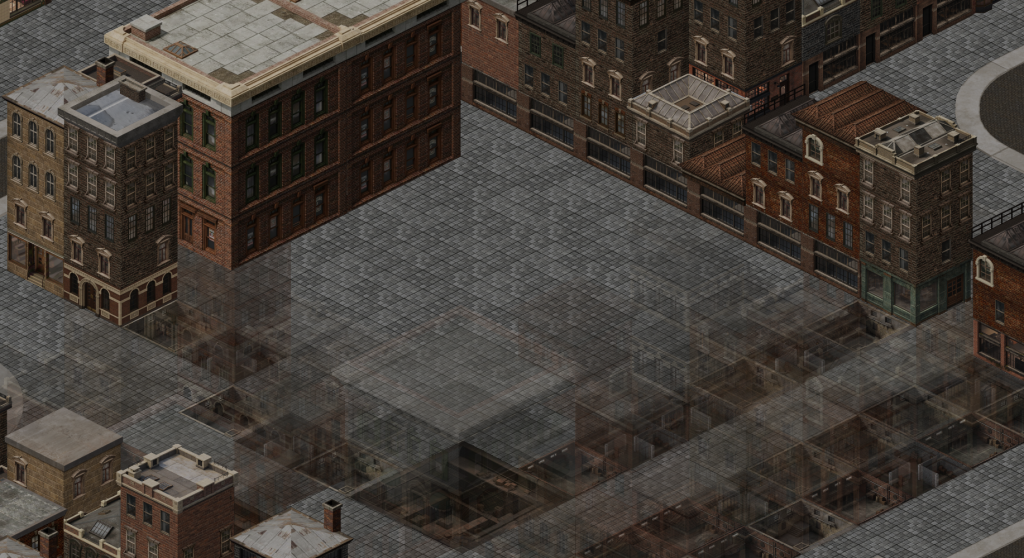
Roll 1 to 3 mains in each direction, then pick positions by rejection sampling with a 100-tile minimum gap. The mains aren’t 1 tile wide. The vertical segment is 13×8, the horizontal is 8×13, the junction is 17×17. Below is a Street View
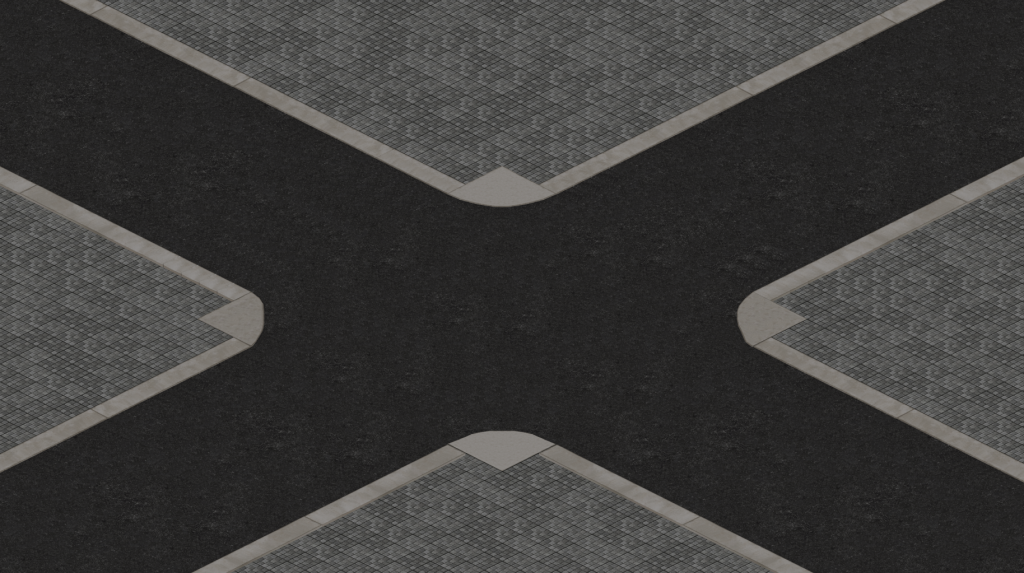
Junctions get stamped first at every Vertical by Horizontal intersection, then verticals walk top-to-bottom skipping junction ranges, then horizontals do the same. Anything left over at the map edges gets a half-length partial variant, because composite tiles don’t tile evenly into arbitrary grid dimensions. After this pass the map is mostly empty. A handful of fat highways and some big junctions floating in a sea of nothing. Below is a City Map View

Full map representation in Map Editor (more on that later):
Subdividing the normal roads
The mains carve the map into a small number of big zones. Before subdivision, we fill the map with normal sized roads in a grid fashion (City Map View below)
Each zone gets recursively split: pick an axis (biased toward the longer side), pick a position by 50 random rolls that reject anything too close to an already-planned corridor on the same axis, drop a corridor there, recurse on the two halves. Recursion stops when a half is too small to take another split. None of this stamps tiles yet. The pass produces a list of planned corridors; a second sub-pass walks the list, stamps actual road markers, and computes the
right junction glyph at every crossing.
Thinning without breaking connectivity
Subdivision leaves the map way too dense, so this pass tears most of it back out. Two hard rules: removing a segment must not disconnect the graph (checked with Tarjan’s bridge-finding, refreshed every 20 removals since removals can promote redundant edges into bridges), and must not leave a perpendicular gap so wide that buildings won’t fit. On top of those, the removal probability for each candidate is read from a 2D value-noise field.
def _rchance(self, x: int, y: int) -> float:
       v = float(self._noise[y, x])
       if v > 0.6:
              return 0.08
       if v > 0.3:
              return 0.15 + 0.15 * ((0.6 - v) / 0.3)
       return 0.45

This is the entire bridge between the noise field and the carve pass. Three bands. Dense regions of noise barely get touched, sparse regions lose almost half their roads, and there's a linear ramp between them. Almost all of the city's "feel" lives in these six lines. Tune the three numbers and the same map ranges from rigidly gridded to almost ruinous.
Sparse regions get an aggressive 45 percent chance, dense regions stay at 8 percent, smooth ramp in between. That’s what gives the city its organic look. Some neighborhoods feel packed and gridded, others feel sparse and irregular. The center of the map is exempt from thinning entirely, because downtown should stay dense..
Dead-end cleanup
Thinning can leave a ╣ whose down-arm now points at nothing. The cleanup pass loops until no changes happen. For each junction tile it walks each of its four directions outward up to 200 tiles, looking for either another road tile (arm is real) or a free cell (arm is dead). Dead arms get cleared, and the junction glyph rewrites itself to match the remaining directions. Walking into the map edge counts as valid, not dead. The pass is cheap because it only touches junction tiles, which number in the low hundreds even on a big map.
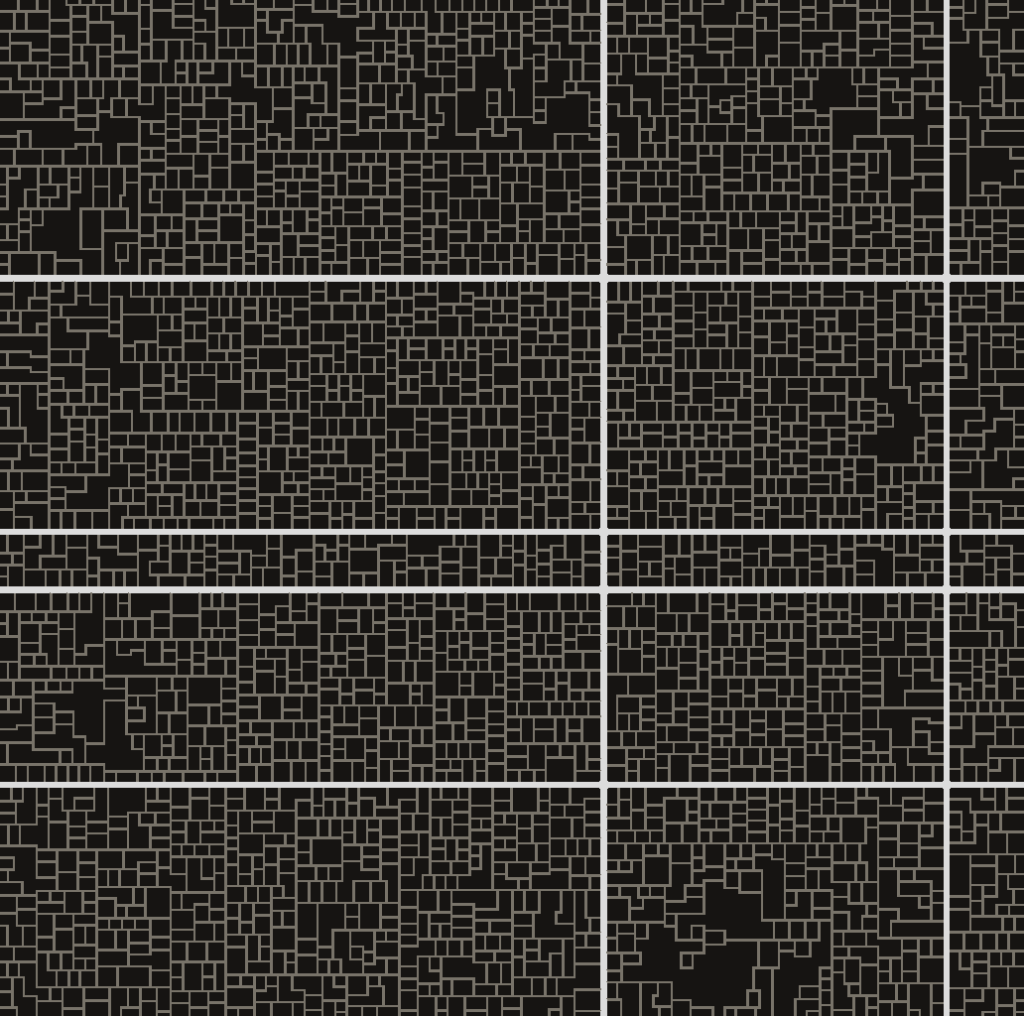
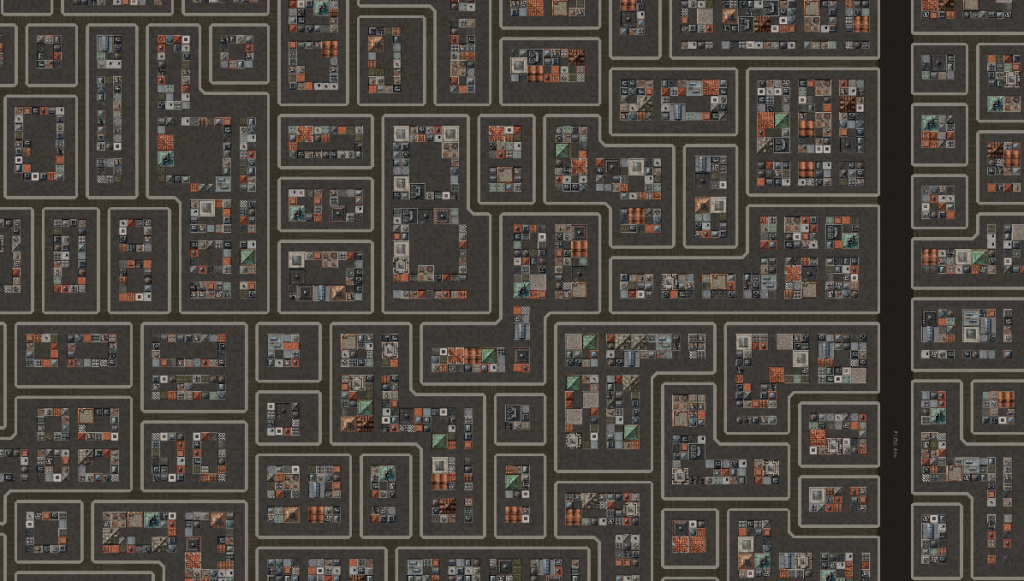
This is the final road product (Near Map View):
In City Map View:
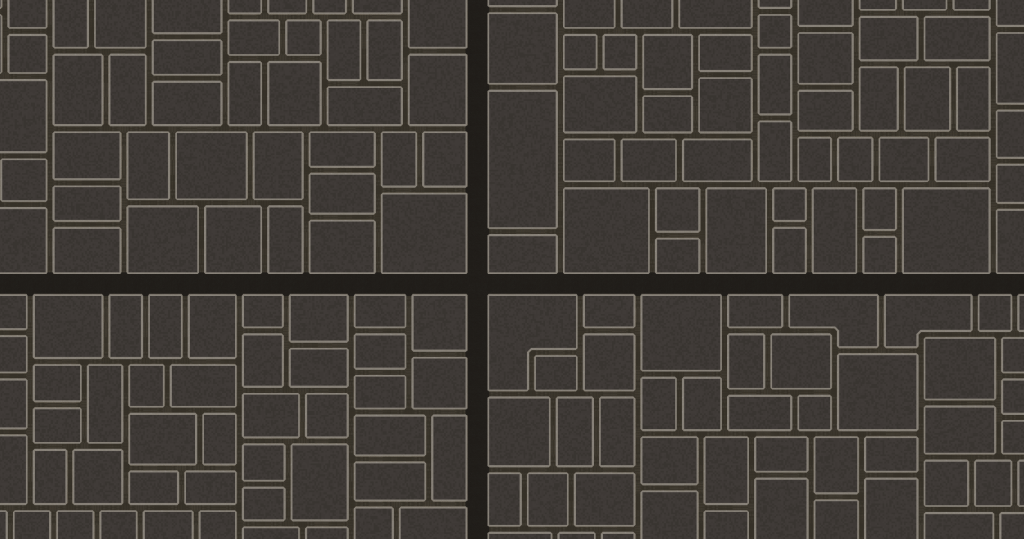
Whole map in Map Editor:
Concepts for road generation
None of the pieces here are novel. Subdivision is BSP, same shape as roguelike dungeon generators except the splits are the roads and the leaves are buildable blocks. Main-road spacing is 1D Poisson disk sampling. Thinning is graph network simplification with Tarjan’s bridge-finding, more or less what GIS tools do when collapsing OSM data into a cleaner road network. The “generate too much, then carve back” pattern is everywhere in PCG anyway, from cellular-automata caves to maze-with-dead-ends-removed. What makes the output feel like a city isn’t the algorithm choice. It’s the ordering, and the fact that the carve pass weights its decisions by a 2D noise field instead of local rules. That’s what bends the gridlines into neighborhoods.
What it specifically isn’t is the Parish-Muller / CityEngine style (L-system grammars growing roads from seed points along terrain/population fields), or Voronoi-based partitioning. Those are the two most famous academic city-PCG approaches and both feel pretty different from what I went with. I wanted a look that wasn’t either, and the combination above gets there.
Street names
After the PCG passes lay down the road grid, every tile is just anonymous pavement – the city has streets, but none of them have names yet. The naming pass walks each row and column, gathers tiles that line up into one corridor (with just enough gap tolerance to step over an intersection so a road through a junction stays one street), then a deterministic seeded allocator hands out names from curated 1920s pools: Mulberry, Bleecker, Halsted, Lexington.
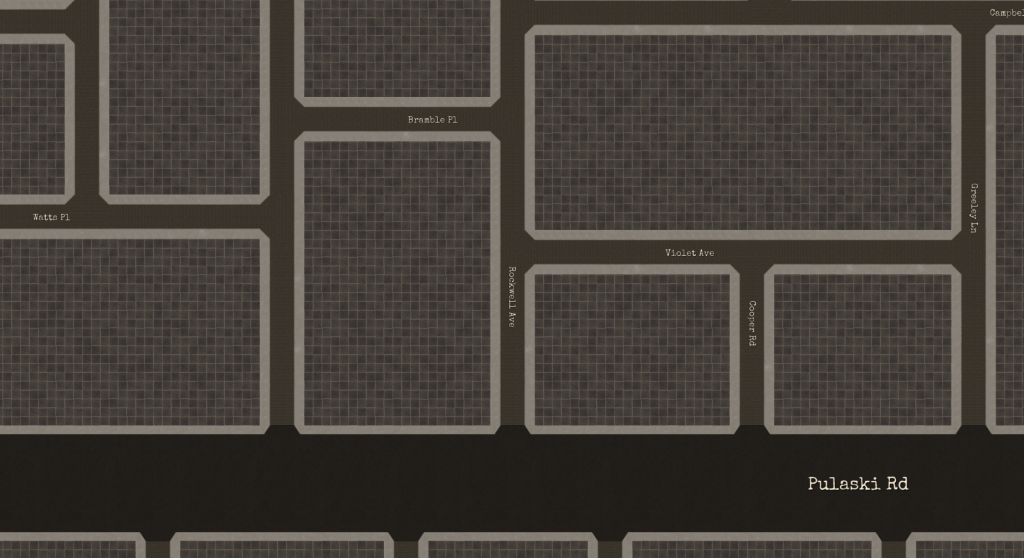
Orientation falls out of the path itself: each step either changes x or y, and the longest straight sub-run containing a label’s anchor decides the axis – ‘h’ becomes angle = 0, ‘v’ becomes pi/2, baked once at street-build time. Each unique name is rasterized by PIL into a 512×64 RGBA strip at font size 44 and packed into a single 16k atlas; I deliberately oversample so on-screen text downsamples instead of blurring through the linear filter. Per frame the ground shader gets a viewport-culled instance array (anchor, angle, atlas slot, quad size), the vertex shader spins each quad’s local offset by cos(angle)/sin(angle) so vertical streets read bottom-to-top without a second mesh, and gl_FragDepth = 0.985 pins the text just above the asphalt so cars and pedestrians still occlude it naturally – one instanced pass, no per-tile glyphs, no per-street draw calls.
Buildings
Where buildings can go
After the streets settle, every cell is either road, near-road, or empty. The buildable region is the empty part. To find it, the road mask gets dilated by 3 tiles so buildings don’t sit flush against the asphalt, and the result is inverted. A connected-components pass on what’s left gives a list of islands, each one a contiguous blob of free cells. Anything smaller than 9 cells gets dropped because nothing useful fits there.
def _build_road_buffer(self) -> np.ndarray:
       road_mask = self._road_occ > 0
       struct = np.ones((7, 7), dtype=bool)
       return binary_dilation(road_mask, structure=struct)

# usage:
buildable = ~self._build_road_buffer() & ~occupied
labeled, num_islands = label(buildable)

binary_dilation with a 7x7 structuring element grows the road mask by 3 tiles in every direction, so buildings can't end up flush against the asphalt. scipy.ndimage.label runs connected-components in a single pass. The PCG never has to think about adjacency or flood-fills directly. Two library calls and the answer falls out as a labeled array, ready to bin into per-island cell lists.
Block fill
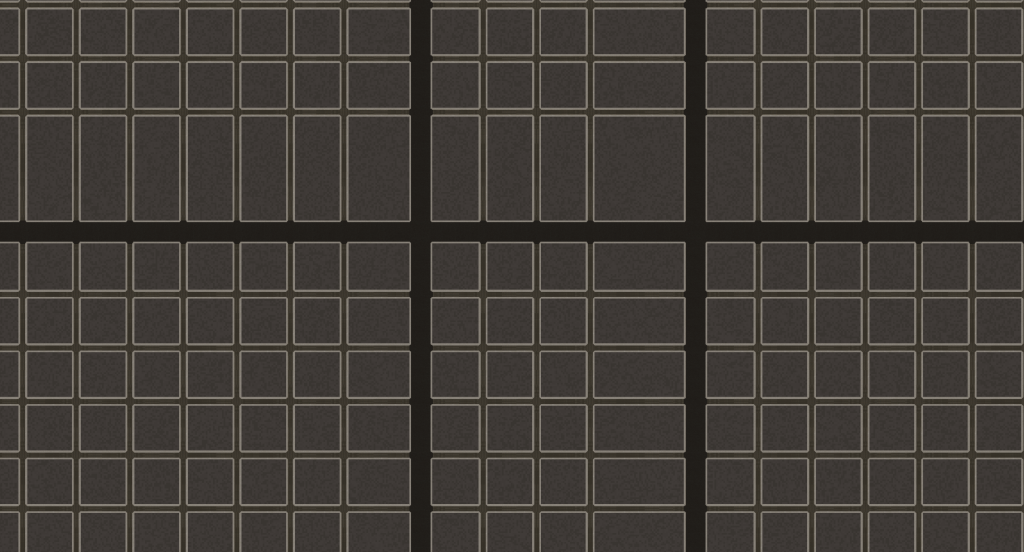
Each island gets carved into 12-tile blocks with 3-tile alleys between them. A block is a 4×4 grid of 3-tile building slots. The fill runs largest-first. First pass: try to drop large buildings (9×9 and 6×6) in edge-touching slots only, because the door needs road access and a slot stuck in the middle of a block can’t have one. If you placed the 3×3 fillers first they’d block every spot a 9×9 could go, which is why the order matters. Between the two passes a validation step removes any large building that ended up enclosed by neighbors that landed after it.
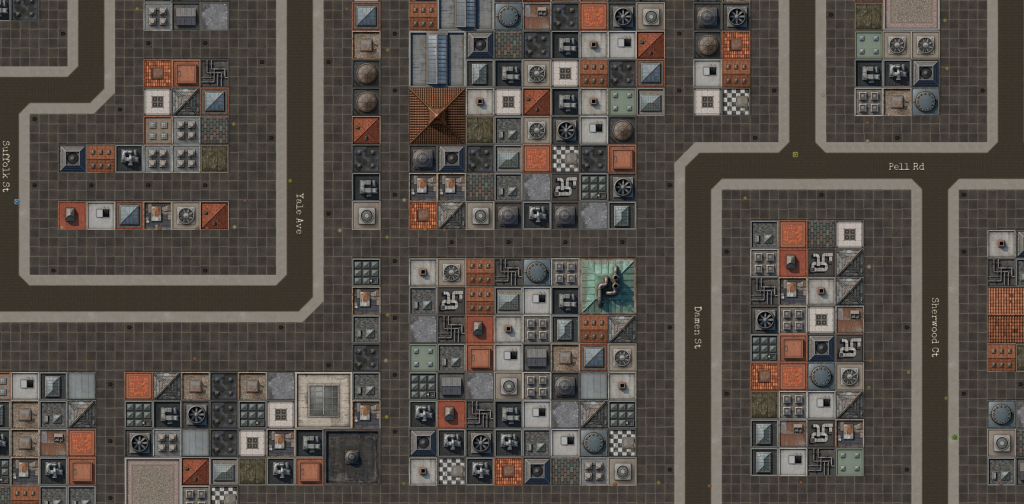
Street View:
Near Map View:

City Map View:
Second pass: fill the remaining slots with 3×3 fillers, marked as placeholders that a later sub-pass can upgrade into real buildings.
Zoning
Not every island should host the same kind of building. Industrial gets 3 to 4 cluster centers seeded in the map’s mid-ring, between 65 and 95 percent of the way from center to edge, each picking one of four shape templates (strip, L, blob, wedge) plus 0 to 3 sprawl tendrils that radiate outward at random angles. Residential gets 4 to 6 centers seeded in the outer ring. Seeds of the same kind are spread apart by a minimum-separation check so two clusters don’t end up on top of each other. Anything not tagged industrial or residential stays commercial by default.
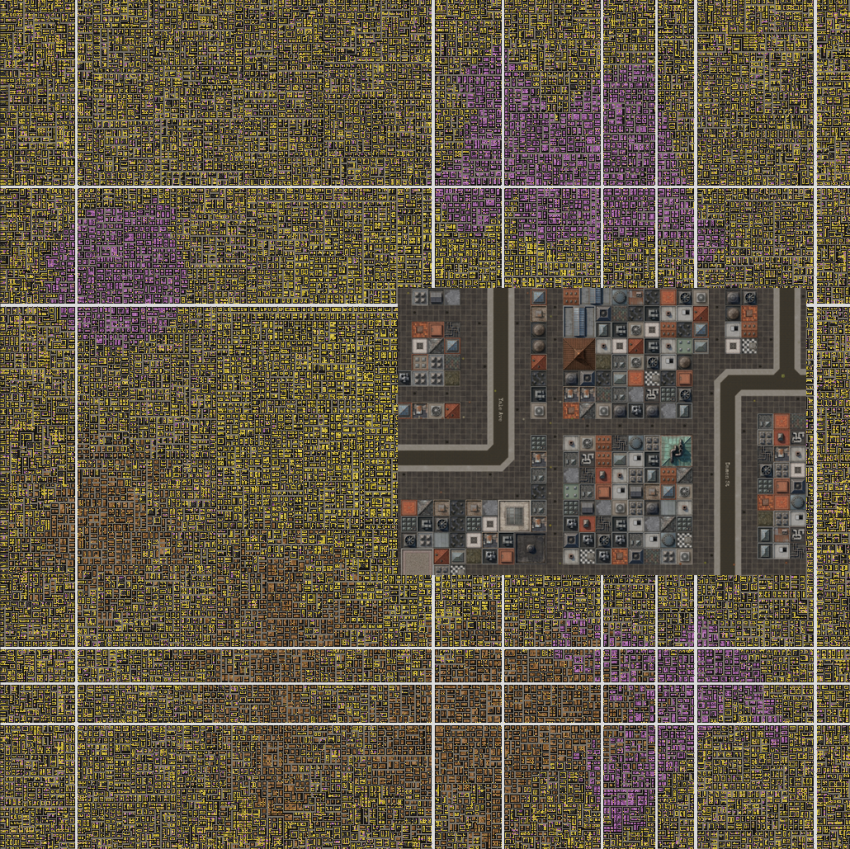
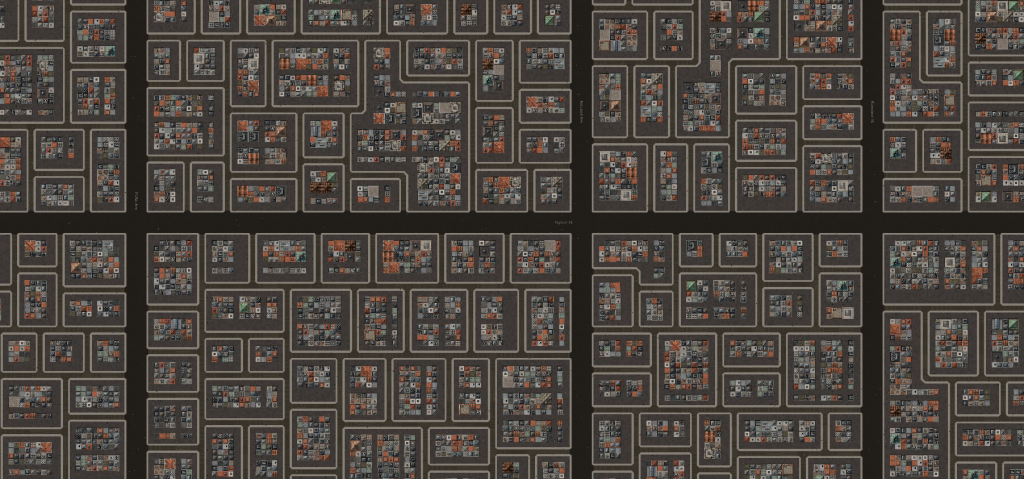
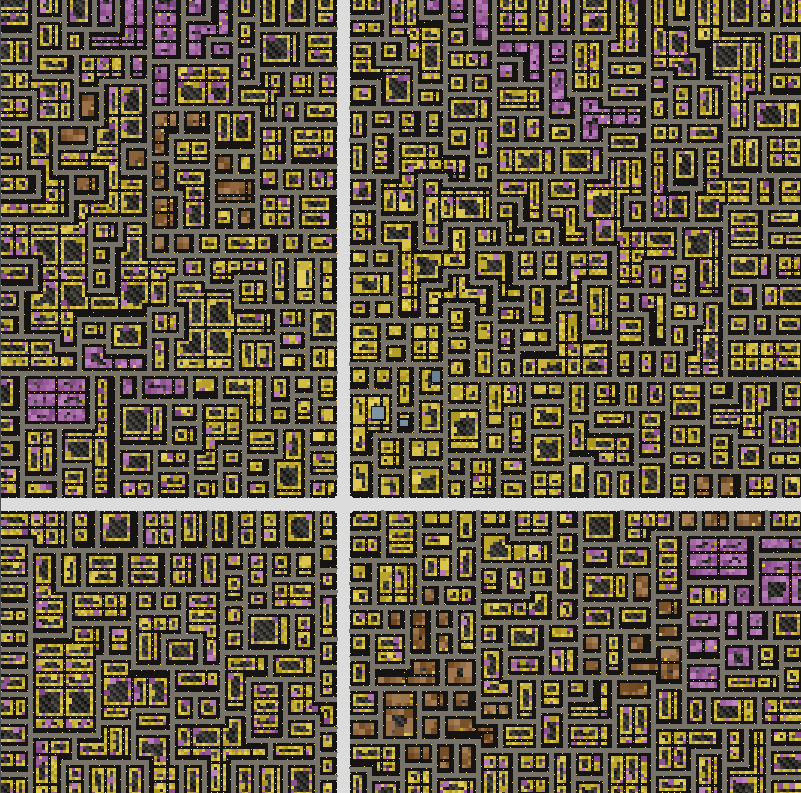
In the Map Editor you can see a procedurally generated areas yellow, brown and purple – commercial, industrial and residential respectively:
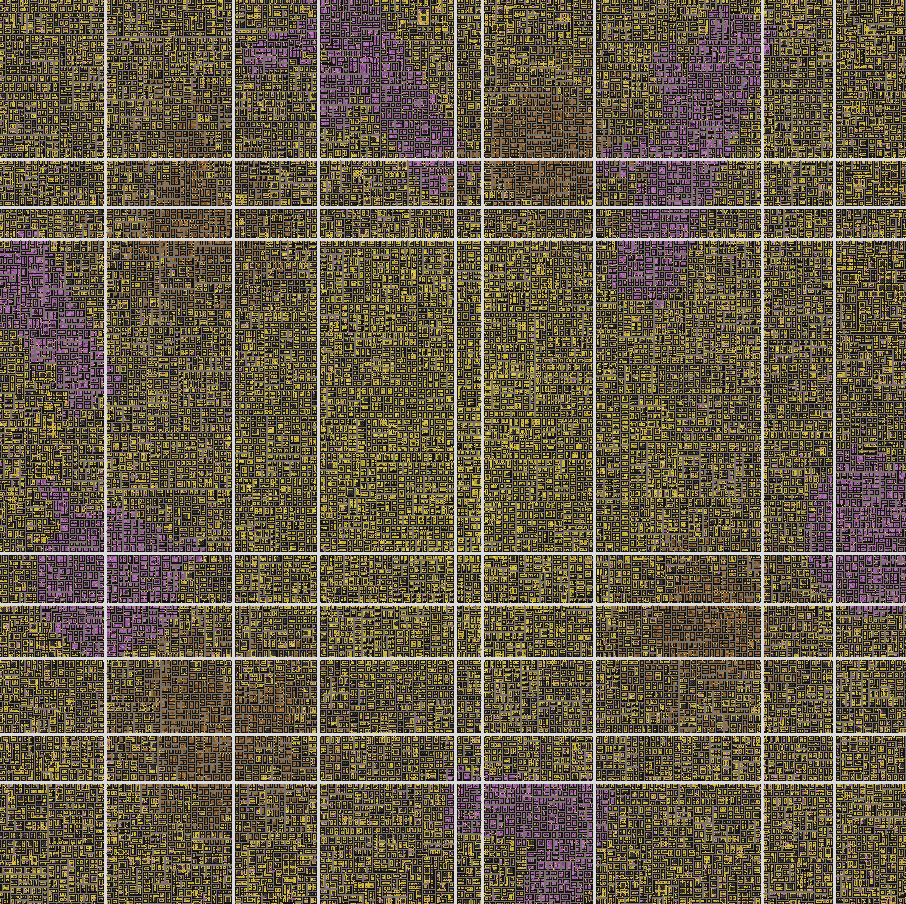
Again, these are just blueprint visualizations inside the Map Editor specially made for visually inspecting blueprints so I wouldn’t have to load up the game every single time:
Smaller version (800×800 tiles):
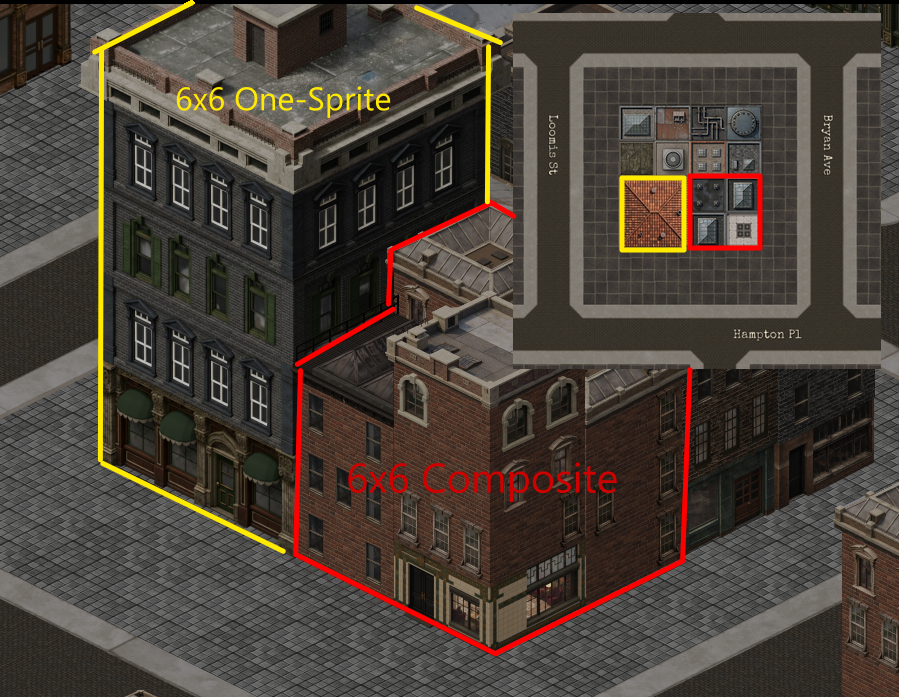
Composites and door tiles
A multi-tile building is a continuous one-sprite for a 6×6 or 9×9 tile building (i.e. a Large Bank or a Department Store). Picking a door tile for a multi-tile building means walking its footprint perimeter and finding the adjacent cell that’s both free and closest to a road. The distance-to-nearest-road is precomputed once as a scipy distance transform, so the actual pick is just reading a few cells from a numpy array and taking the minimum. But sometimes the door gets blocked by other buildings .This is where the composite buildings come in (they’re more flexible as you can construct a 6×6 with four 3x3s building sprites, etc.). Composite buildings have an issue: the door has to land on whichever side of the building actually has a door sprite, and that varies by facade variant. So the loop iterates facade options until one of them lines up with a free outside-door tile. If no variant works, the building doesn’t place.
Props
The props pass runs last, after streets and buildings have settled. Right now it’s just lampposts. They line each main road at 8-tile spacing, each normal road at 5-tile spacing, and scatter through the alleys with a 6-tile Chebyshev keep-out so two lamps never end up shoulder to shoulder. Hydrants, benches, mailboxes, fences, and trash cans are queued up for the same pass when I get around to them. After this the blueprint is done. The loader takes over and starts instantiating actual game objects from it.
Finished Map
It’s quite interesting to note that back in 2016 during my first attempt to make this game, PCG was the first challenge I tackled as this seemed to be the most interesting part of game dev to me – creating sprawling algos interacting with each other to breathe life into a simulation. Obviously, I started working on this iteration (this game) since 2023 but I find it cool to think that it took 10 years to fully materialize PCG algos into something tangible. I hope you enjoyed reading the post as much as I did working on this sporadically in the last decade.